

So, as promised, I will be sharing how you can get a VSCO effect for your photos for free. After seeing Rachelle's post about how to make it with Photoshop, I was really sad to not be able to capture the effect since my Photoshop elements doesn't have a lot of the essential setting for the tutorial. After searching all over the internet to find out on how to make a free VSCO effect, I decided to do it myself. No Photoshop required. I hope you find this useful, but please do not steal this tutorial and call it your own. I spent a LOT of time perfecting this, so please be respectful. :) I know it's not great but I'll keep on trying to perfect it so can look a little better. 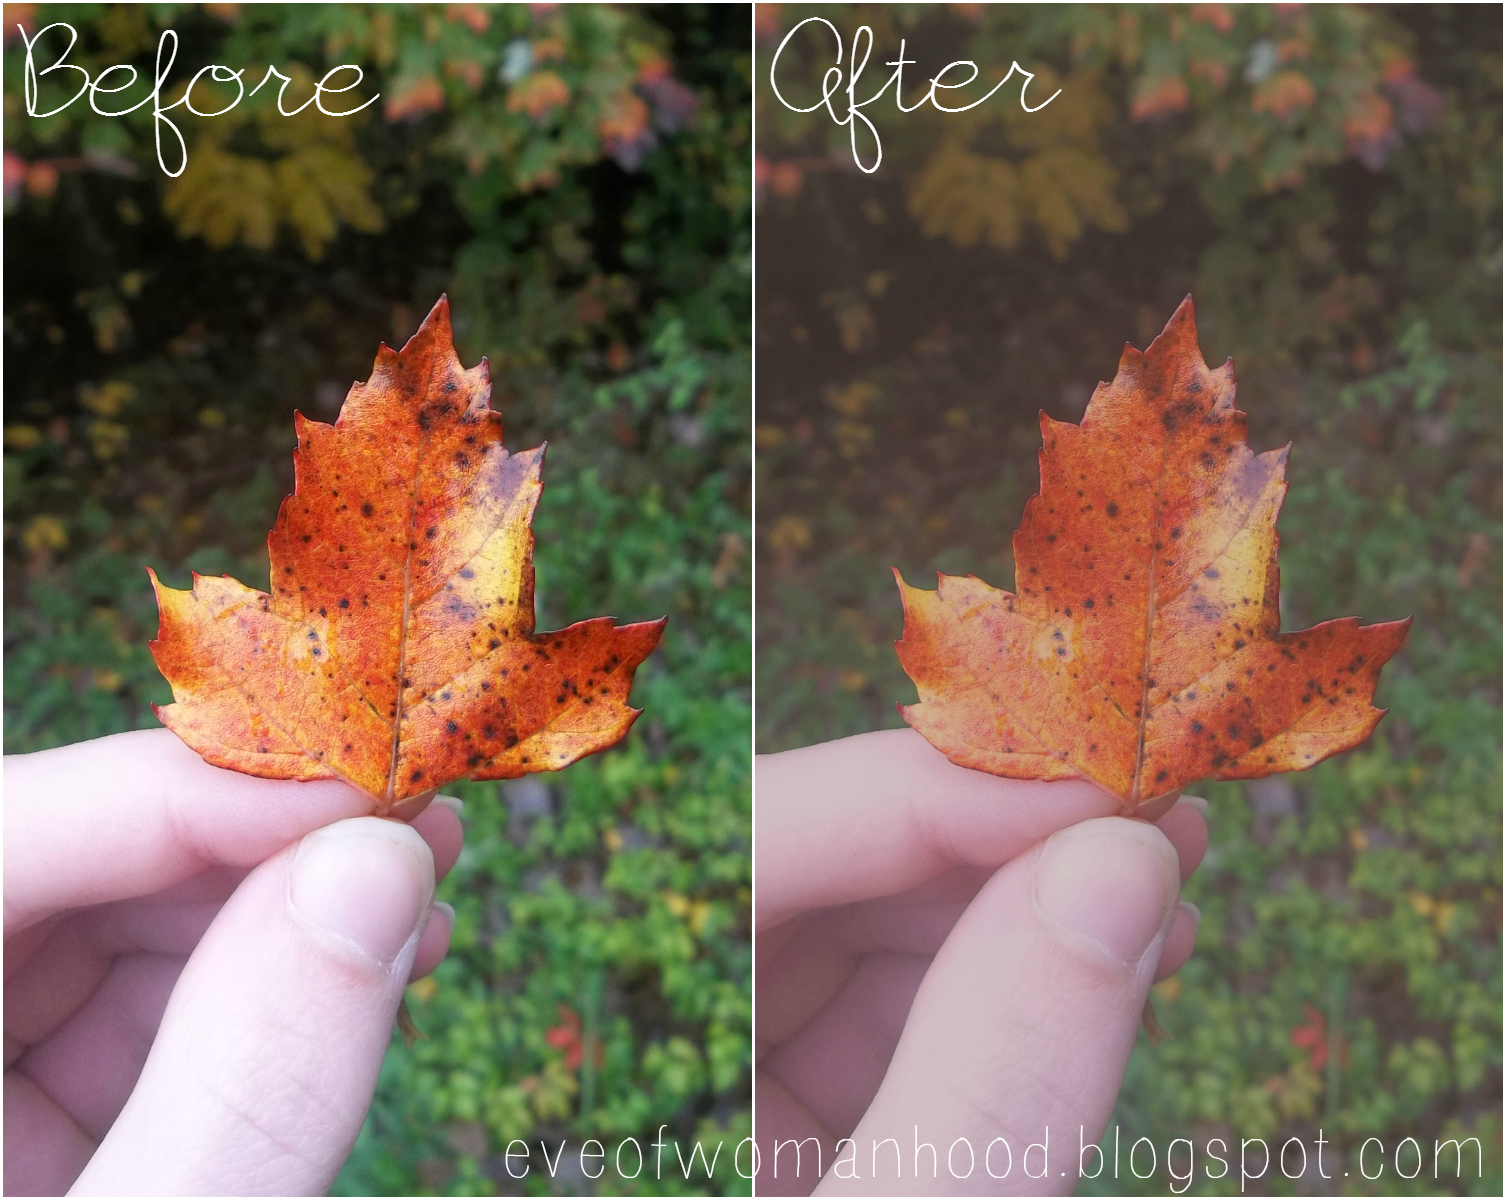
All you need to do is go to this link to get started:
It's a free site that has a lot of beginner Photoshop elements in it. Once you're there, click 'open image from computer' and then you're all set. :)
Please remember that you may need to adjust these settings so you can capture the VSCO effect with any photo. So just play around with the different setting to see what is right for you.
~I will also be making a b&w VSCO inspired version soon.~
Please note: I am not trying to compete with the official VSCO company or am saying that my amateur effect is better than theirs. They have amazing effects and you can check out at their website here.
P.S. All these setting are under the 'Adjustments' tab.
Click on the tab 'Adjustments' and then click on 'Brightness & Contrast'. Set the 'Brightness' to 7 and the 'Contrast' to -25.

~~~~~~~~~~~~~~~~~~~~~~~~~~~~~~~~~~~~~~~~~
Next go to 'Color Balance'. Set the 'red offset' to 16.
~If you want to make another color pop, then adjust the other ones as well~

~~~~~~~~~~~~~~~~~~~~~~~~~~~~~~~~~~~~~~~~~
After that, go to 'Curves'. To give your photo a shadowy filmy effect drag the line just a smidge lower than it was before.

~~~~~~~~~~~~~~~~~~~~~~~~~~~~~~~~~~~~~~~~~
Then click on 'Hue & Saturation'.
Change the:
Hue:0
Saturation:6
Lightness:3
After your done, go to it again. Adjust the 'lightness' to -11.

~~~~~~~~~~~~~~~~~~~~~~~~~~~~~~~~~~~~~~~~~
Last but not least head on over to 'Brightness & Contrast' again and change the:
Brightness:-5
Contrast:-15

Go to it again after pressing the 'ok' button and set the:
Brightness:5
Contrast:-6
~~~~~~~~~~~~~~~~~~~~~~~~~~~~~~~~~~~~~~~~~
When your done click on the 'File' tab and click on 'Save'.
Yay, you're all done! Like I said before, play around with the settings to complement your photo.
Ooh, fun! I'm getting Photoshop for my birthday. You should do more of these!!
ReplyDeleteI'm so happy for you! I bet you're gonna have a balst with it! Before your b-day you could practice and become more familiar with Pixlr. It's like a mini Photoshop for beginners. :) Then when you get Photoshop you'll know what different things do and such.
DeleteHey, you got nominated for the Famous People award on my blog :)
ReplyDeletehttp://thefashioncheetah.blogspot.ca/2014/11/famous-people-award.html
Yay, thank you!
DeleteThanks for the tutorial! -Bethany!
ReplyDeleteNo prob. Glad you found it helpful. :)
DeleteGreat job on this tutorial, Eve. :) You're doing a great job with everything on your blog, keep going!
ReplyDeleteThanks Tane! You just made my day!
Delete