

Okay, so today I'm going to show you how to put multiple links on a header.
With the help of Rachelle and her blog Beloved Bluebirds(you should really check out her blog), I was able to understand how to do this. I hope this is helpful for you. :)
1. Go to PicMonkey (or any other place that you could make a header) and make your header and customize it.
2. Then save your image.

3. Go to this link and click on the Browse For File button. Once you've chosen the right image click on Start Mapping.

4. When you're there right click on the part of the image you want to link and click on Create Rect.
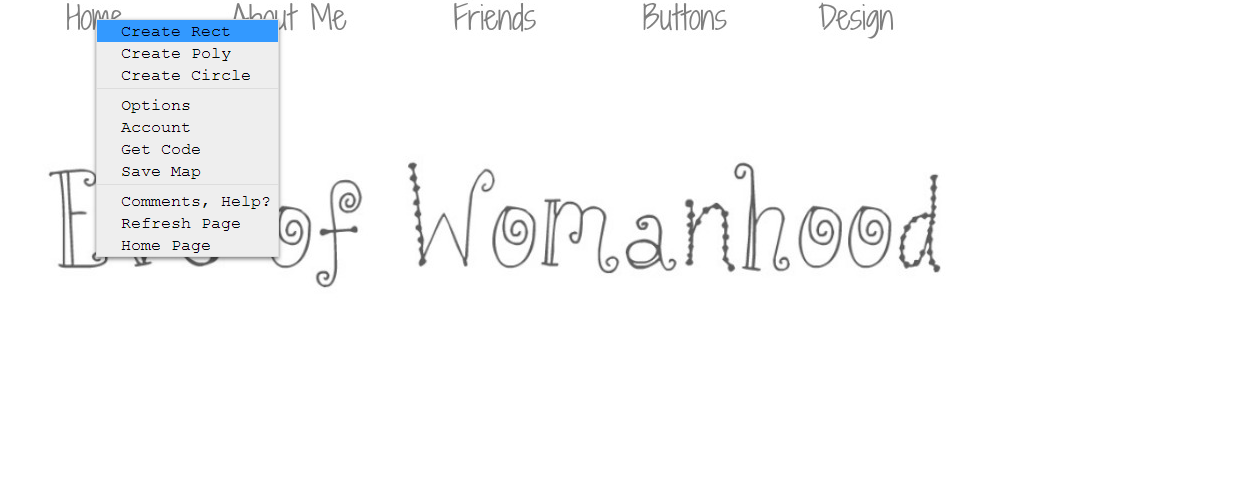
5. Crop over the spot you want the link to be.
6. Go to the page that you want it to link to and copy the URL then paste it on all four of the boxes.
7. Repeat these steps (with the different links you want each one to have) until you are satisfied with the linking.

P.S.
Don't be alarmed if the places you've cropped and linked look red. It won't look like that when you put it on your website.

8. Right click again and click on Get Code.
9. Click on the HTML Code tab and scroll all the way down. There is a code there that you will copy and paste later so don't exit from there.

10. Log in to your blogger account and go to dashboard, then go to the blog's overview you want to put the header on. Then go to template and then click on Edit HTML.
11. Find this code : <b:section class='header' id='header' maxwidgets='1' showaddelement='no'>2<b:widget id='Header1' locked='true' title='YOUR_BLOG_TITLE (Header)' type='Header'/>
P.S. Push Ctrl and F to search for the specific code. Don't forget about changing YOUR BLOG TITLE to your actual blog title.
12. Change the code a little. Where it says "maxwidget='1'" make it 2.
Where it says "showaddelement=no" make it yes and
"locked='true'" make it false instead.
13. This is what it show look like after these changes:
<b:section class='header' id='header' maxwidgets='2' showaddelement='yes'> <b:widget id='Header1' locked='false' title='YOUR_BLOG_TITLE (Header)' type='Header'/>
14. Save your changes and go to your Layout.
15. Click on your Blog Header and remove it, and put a Html/JavaScript gadget in the header's place.
16.Go back to the image mapping site that you already have up and copy the code and paste it into the HTML/JavaScript gadget.
17. Save your changes and make sure everything works on it.

I hope you enjoyed this post! If you have any questions or thoughts just comment below.
Wow! I always wondered how to do that. It might be a bit confusing for me though, I'm not too good with that kind of thing. :P I love that design though! :) Have a blessed day!
ReplyDeleteLove in Christ,
Sarah